Maintaining dental health is crucial, but it doesn’t always have to come with hefty expenses. If you’ve recently completed orthodontic treatment or simply need a replacement retainer, creating a DIY retainer at home can be a cost-effective and practical solution. By using safe, affordable materials and following the right techniques, you can ensure your teeth stay in their proper alignment without breaking the bank.
For many, retainers are essential in preserving the results of months or even years of orthodontic work. With rising costs of professional dental care, the idea of a DIY retainer has gained traction as a viable option. However, it’s important to approach this process with caution and ensure that safety and hygiene are prioritized. A homemade solution can work well for temporary use, but understanding the process thoroughly is key to avoiding potential risks.
This comprehensive guide is designed to walk you through everything you need to know about creating a DIY retainer. From understanding the tools and materials required to learning how to shape and customize your retainer for maximum comfort, we’ll cover it all. Whether you’re looking for a temporary fix or exploring a creative project, this article will provide expert advice and step-by-step instructions to help you achieve the best results.
Table of Contents
- What Are Retainers? A Quick Overview
- Types of Retainers and Their Uses
- Benefits of Making a DIY Retainer
- Materials Needed for a DIY Retainer
- Safety Considerations Before Proceeding
- Step-by-Step Guide to Making a DIY Retainer
- Customizing Your Retainer for a Perfect Fit
- How to Maintain and Clean Your DIY Retainer
- Common Mistakes to Avoid When Making a DIY Retainer
- Temporary vs. Permanent DIY Retainers
- When to Consider Seeing a Dentist Instead
- Cost Comparison: DIY Retainer vs. Professional Retainer
- Frequently Asked Questions
- Conclusion
What Are Retainers? A Quick Overview
Retainers are custom-made dental devices designed to help maintain the alignment of your teeth after orthodontic treatment. They ensure that your teeth remain in their corrected positions, preventing them from shifting back to their original alignment. Retainers can be removable or fixed, depending on the patient’s needs and the recommendations of their orthodontist.
Orthodontic treatments, such as braces or aligners, put significant pressure on teeth to move them into the desired positions. Once the treatment is complete, retainers act as a holding mechanism, allowing the surrounding gums and bones to stabilize around the newly aligned teeth. Skipping the use of a retainer can lead to relapse, where teeth gradually drift back to their previous misaligned state.
While professionally-made retainers are ideal in terms of fit and durability, they can be expensive. This has led some individuals to explore DIY options as a temporary or low-cost alternative. However, it’s crucial to recognize that DIY retainers are best suited for short-term use or as an interim solution until a professional retainer can be obtained.
Types of Retainers and Their Uses
There are three main types of retainers, each with its own set of advantages and limitations:
1. Hawley Retainers
Hawley retainers are the most common type of removable retainers. Made from a combination of metal wires and acrylic, these retainers are adjustable and durable. The wires fit snugly around the front teeth, while the acrylic base rests on the roof of the mouth or along the lower jaw.
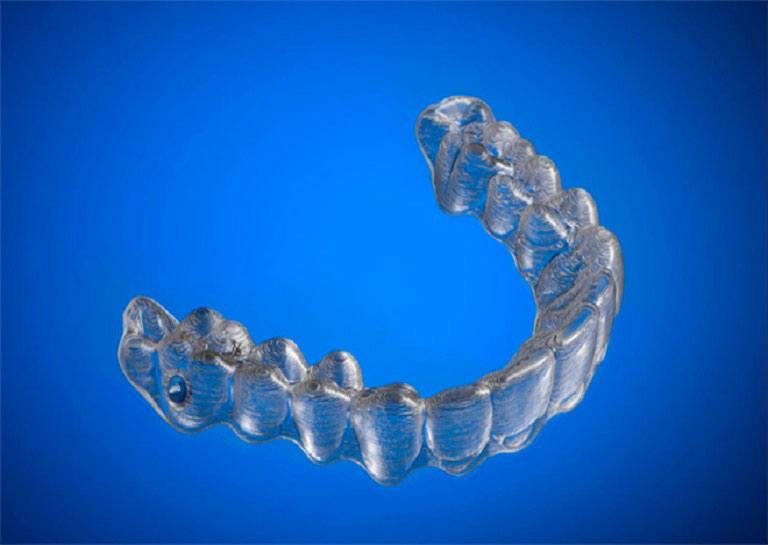
2. Clear Plastic Retainers
Clear retainers, often referred to as Essix retainers, are made from transparent plastic material. These retainers are virtually invisible and fit tightly over the teeth, making them a popular choice for those who prefer a discreet option. However, they are more prone to cracking and may need to be replaced more frequently.
3. Fixed Retainers
Fixed retainers consist of a thin wire bonded to the back of the teeth. These retainers are not removable and are typically used for long-term retention. They are particularly effective in preventing the front teeth from shifting but can be challenging to clean and maintain.
Understanding the type of retainer you need is essential before attempting to create a DIY version. Most DIY retainers mimic the design of clear plastic retainers, as they are easier to replicate at home using readily available materials.
Benefits of Making a DIY Retainer
Creating a DIY retainer offers several advantages, particularly for those looking for a temporary or cost-effective solution. Here are some of the key benefits:
- Cost-Effective: Professional retainers can cost hundreds of dollars, whereas DIY retainers can be made at a fraction of the cost.
- Convenience: If you’ve lost or damaged your retainer, a DIY option can serve as a quick fix until you can replace it professionally.
- Customizable: Making your own retainer allows you to tailor it to your comfort and preferences.
- Accessibility: DIY retainers can be made using materials that are easy to obtain, eliminating the need for frequent dental visits.
While these benefits are appealing, it’s important to weigh them against the potential risks. DIY retainers should never replace professional advice or care, especially if you notice discomfort or issues with your dental alignment.
Materials Needed for a DIY Retainer
Before you begin making your DIY retainer, ensure you have the following materials on hand:
- Dental-grade thermoplastic sheets
- Boiling water
- Scissors
- Non-toxic molding clay or putty
- Dental file or emery board
- Plastic spatula or tongs (for handling hot materials)
- Clean, flat surface for working
It’s important to use only dental-safe materials to avoid potential health risks. Avoid using household plastics or adhesives that may contain harmful chemicals.
Safety Considerations Before Proceeding
Creating a DIY retainer requires a careful and hygienic approach to ensure the safety and effectiveness of the final product. Here are some safety tips to keep in mind:
- Material Safety: Always use food-grade or dental-grade materials that are free from harmful chemicals.
- Hygiene: Thoroughly clean all materials and tools before use to prevent contamination.
- Supervision: If you’re a minor, ensure an adult supervises the process, especially when handling hot water or sharp tools.
- Consultation: Speak with your dentist before attempting to create a DIY retainer, especially if you have a complex dental history.
By following these precautions, you can minimize risks and ensure a safer experience when making your DIY retainer.
Step-by-Step Guide to Making a DIY Retainer
Below is a detailed guide to help you create your own DIY retainer at home:
- Begin by softening the thermoplastic sheet in boiling water until it becomes pliable.
- Carefully place the softened plastic over your teeth to create a mold, pressing gently to capture the contours of your teeth.
- Allow the plastic to cool and harden, ensuring it maintains the shape of your dental alignment.
- Trim any excess plastic using scissors, leaving a comfortable margin around the edges.
- Use a dental file to smooth out rough edges for added comfort.
- Test the fit of the retainer, ensuring it feels snug but not overly tight.
Repeat the process if necessary to achieve the desired fit. Remember, the goal is to create a retainer that holds your teeth in place without causing discomfort.
Customizing Your Retainer for a Perfect Fit
Customizing your DIY retainer can enhance its comfort and effectiveness. Here are some tips for achieving a perfect fit:
- Adjust the Shape: Use a dental file to refine the edges and contour the retainer to fit your mouth more comfortably.
- Add Personalization: Consider adding non-toxic markers or designs to help identify your retainer easily.
- Test for Stability: Ensure the retainer stays in place when you talk or chew, without causing discomfort.
Taking the time to customize your retainer will ensure a better fit and improved usability.
Frequently Asked Questions
Here are some common questions about DIY retainers:
1. Is a DIY retainer safe to use?
Yes, but only if made with dental-safe materials and proper hygiene. It’s best used as a temporary solution.
2. How long can I use a DIY retainer?
A DIY retainer is typically suitable for short-term use until a professional one is obtained.
3. Can I create a DIY retainer for children?
Yes, but adult supervision and consultation with a dentist are essential to ensure safety.
4. What should I do if my DIY retainer causes discomfort?
Remove the retainer immediately and consult a dentist to address the issue.
5. How do I clean my DIY retainer?
Clean it daily with lukewarm water and mild soap. Avoid using hot water, as it can warp the material.
6. Are DIY retainers as effective as professional ones?
DIY retainers can be effective for temporary use but lack the precision and durability of professional retainers.
Conclusion
Creating a DIY retainer can be a practical and cost-effective solution for maintaining your dental alignment, especially as a temporary fix. By following the steps outlined in this guide and prioritizing safety and hygiene, you can craft a retainer that suits your needs. However, always remember that professional dental care is irreplaceable. If you experience any issues or discomfort, it’s best to consult a qualified dentist for guidance.
For long-term dental health, investing in a professionally-made retainer is the wisest choice. In the meantime, a DIY retainer can serve as an innovative and affordable stopgap solution.
You Might Also Like
The Ultimate Guide To The Ninni Pacifier: Benefits, Features, And TipsBrittany Mills: A Story That Continues To Resonate
Essential Guide To Santander Repossession: What You Need To Know
Creative Techniques And Tips For Rabbit Sketching
Aldi Jasper: The Multifaceted Persona Behind The Name
Article Recommendations
- Mydocs Portal Your Ultimate Digital Document Management Solution
- Feather Tattoos Timeless Symbolism And Artistic Expression
- Exploring The Journey Of Pat Mclaughlin A Comprehensive Review And Insightful Tips